Lino-printing is a form of relief printing, which means that areas are carved away from the surface using a tool and the ink is rolled on to the raised area that remains. Paper is applied and pressed or ‘burnished’ and the raised area of your design creates the print. It derives from woodblock printing which was used in the Far East for the practical application of textile printing. It was also used for printing artwork onto paper.
I love lino-printing. I enjoy the old fashioned, hands-on feel of carving the design and then the inking and printing process. I hand-print on to Japanese paper burnishing the design with a wooden spoon. It’s a timeless practice to register a fresh, modern image.
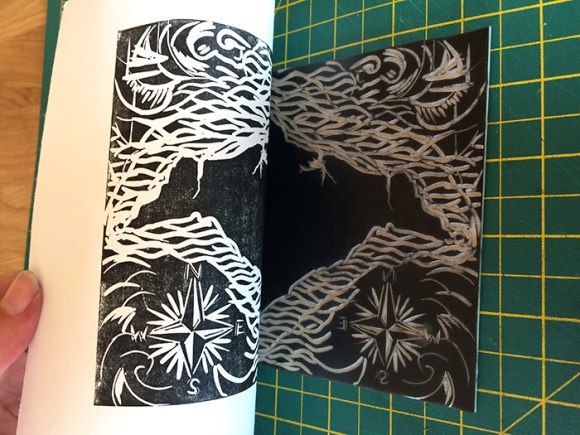
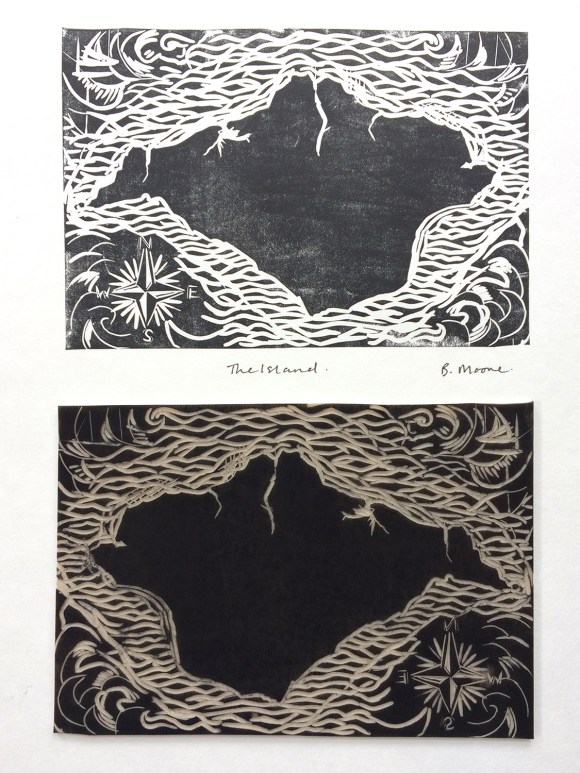
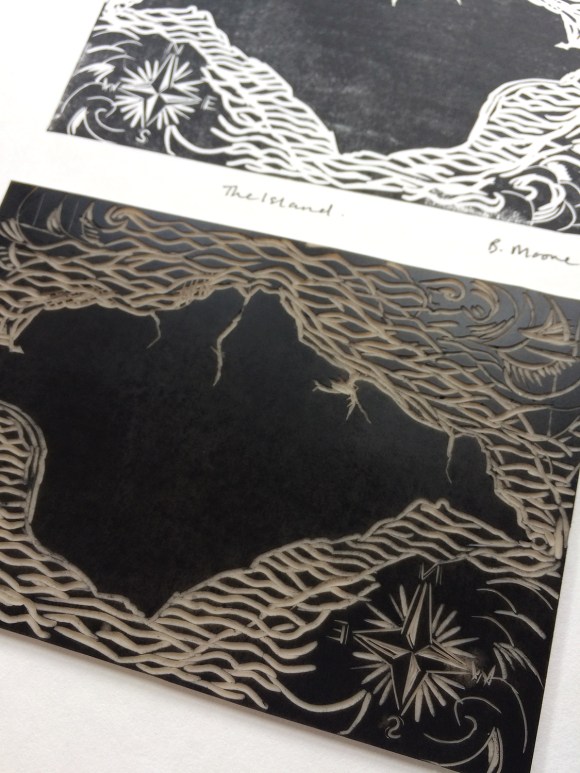
Here’s a step by step guide of how I carved, inked and printed my ‘The Island’ design.
Step one. Create your design.
I wanted to create a lino-cut of the Isle Of Wight and I wanted it to be an accurate representation so I traced the Island shape off of a marine chart.

Step Two. Transfer your image onto your lino
The image that you print will be the mirror image of what you carve so I used Photoshop to re-scale my design and then reversed it (flip horizontal). The image I transfer on to the lino is a back-to-front Isle Of Wight. I coat the back of my reversed image with charcoal and then redraw the outline directly onto the lino. Some artists draw free-hand and others use carbon paper.

Step Three. Carving your image
I used two Pfeil tools to carve thin lines or deep grooves. The tools are sharp. ALWAYS carve AWAY from you. I carved around my island shape and started to add texture into the sea surround.


Step Four. Test printing
I rolled out the ink on to a flat glass surface to get the best texture. I use an old picture frame with taped up edges for safety. I used the roller to ink up my half-finished design so I could take a test print and see if I’m happy with the waves. I placed the paper on top of the design and rubbed it firmly through the back with a wooden spoon. At this stage I decided to add more nautical motifs around the edges and carved a compass, waves and some boats. Remember, it’s a mirror image you’re carving so if you’re using lettering you need to carve it back to front (see the compass).


Step Five. Print!
I was happy with the new additions, it took on a very ‘treasure map’ feel which I hadn’t expected but grew organically from the mark-making and the look and feel of the paper and ink.
If you’d like to learn more about lino-printing, be inspired by my Island design or create your own unique artwork then I often run fun and friendly lino-printing workshops.
Get in touch to find out more or follow me on Facebook to see my latest events.
