If you enjoy illustrating and you would like to try something a little different, why not have a rifle through your sketchbook for some lost or forgotten sketches and create a repeat pattern of your own design?
I’ve laid out some step-by-step images for you below based on a square design I did. The images show you how to create a ‘half-drop’ pattern (which means your pattern will repeat diagonally down the page, just like wallpaper does!)
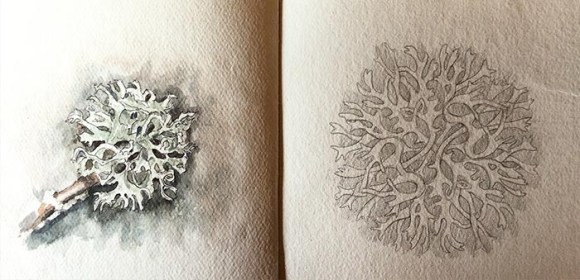
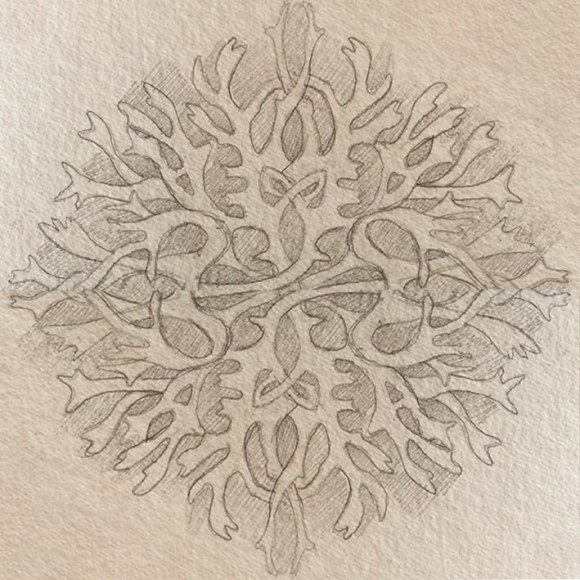
Step One
I started off by drawing a stylised piece of lichen that I picked up from a lovely Isle Of Wight Autumnal walk along the Medina River.
I drew it in a square box 10cm x 10cm and then photocopied it so I’ve got the original still in my sketchbook.
Step Two
I cut my photocopied design into 4 equal pieces (It’s very important that they are all the same size).
I measured and cut straight down, and across the middle. (I have numbered the squares to show you the process)

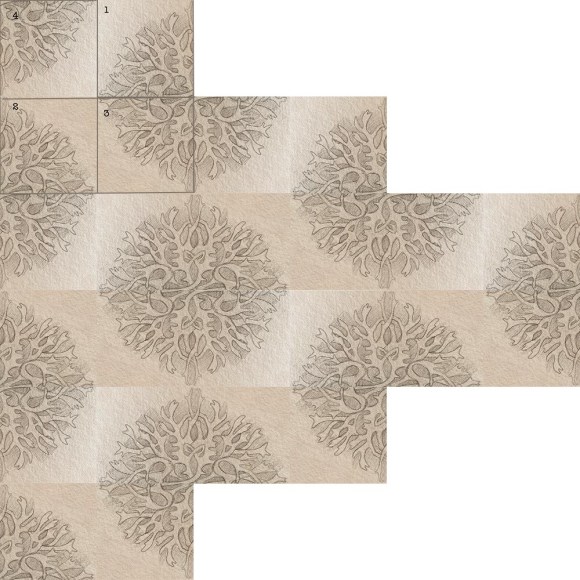
Step Three
I reassembled the pieces into the new configuration below (see how the numbers have moved across; squares 1 and 3 are now on the right and squares 4 and 2 have been swapped and moved across to the left). When your squares look like this, sellotape the back of your ‘new’ tile design.
This is the basis for your ‘half-drop’ repeat pattern.
Photocopy your new tile several times.

Step Four
Cut your new tiles out, ensuring they are exactly the same size as your original (in this instance 10cm x 10cm) and line them up next to each other as I have done below. You *should* get a seamless repeat of your design. If not, have another go double-checking your measurements.
Step Five
If you loved it you can run with it! How about adding a new drawing into the gaps at Step Three? (see below for my design ideas to take my pattern forward).
You can use a different size tile, what about a rectangular one? As long as your 4 pieces are equal in size at step two then it should work just as well (e.g. a 10cm x 8cm rectangle will cut down into 4 equal rectangles of 5cm x 4cm)
Have you tried lino-printing? How about carving a lino block with your template tile at Step Three and printing your design onto fabric?! What about a bag, a scarf, or metres of plain material ready to make a ‘one-of-a-kind’ garment? I’m always running lino-printing workshops across the Island if you would like to join me.
Did you know that you can sell your designs on various websites? If you love designing patterns you can visit on-line sites like Spoonflower or Tilt to upload them on to items that will be ‘beautiful or useful’ for you and your home. Wouldn’t William Morris be proud?
Let me know how you get on.
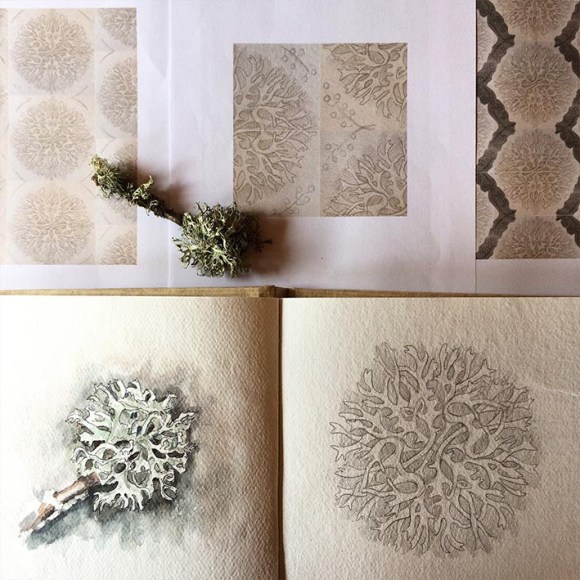
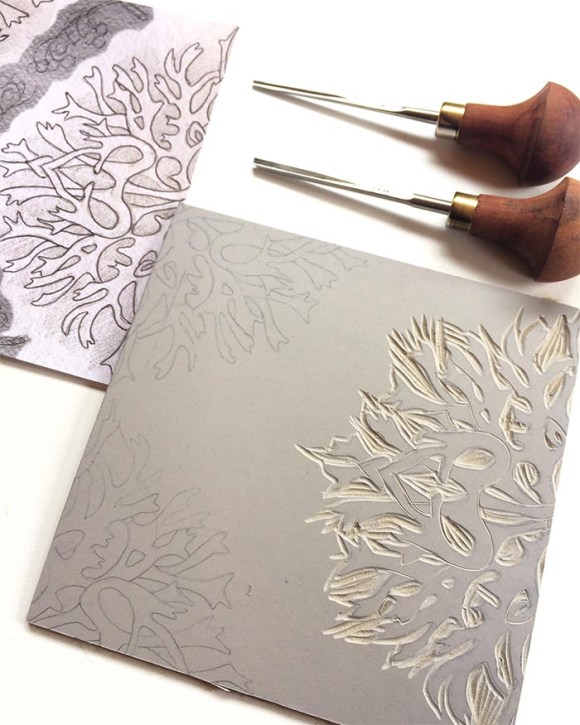
*Update*
Here’s some photos of my lino-block carving in progress and how the repeat works when I printed it up. I think it would make great wrapping paper. Perhaps you could substitute the lichen concept for snowflakes and create your own festive, recyclable wrapping and tags?!